Website Disclaimer Popup
- Installation
- Basic Settings
- Module Settings
- Link Settings
- Content Settings
- Styling Settings
- Advanced
- Troubleshoot
Version: 3.4
Installation
After successful UNZIP of the file WebsiteDisclaimer_UNZIP.zip you will find the module zip file and the ReadMe.txt file inside the folder.
- For Joomla 3.x.x and 4.x.x install : mod_disclaimer_X.x.zip
Go to Extensions > Extension Manager and click on the Upload Package File Tab.
Click on browse to choose the correct installation file and click on "Upload and Install"
Basic Settings
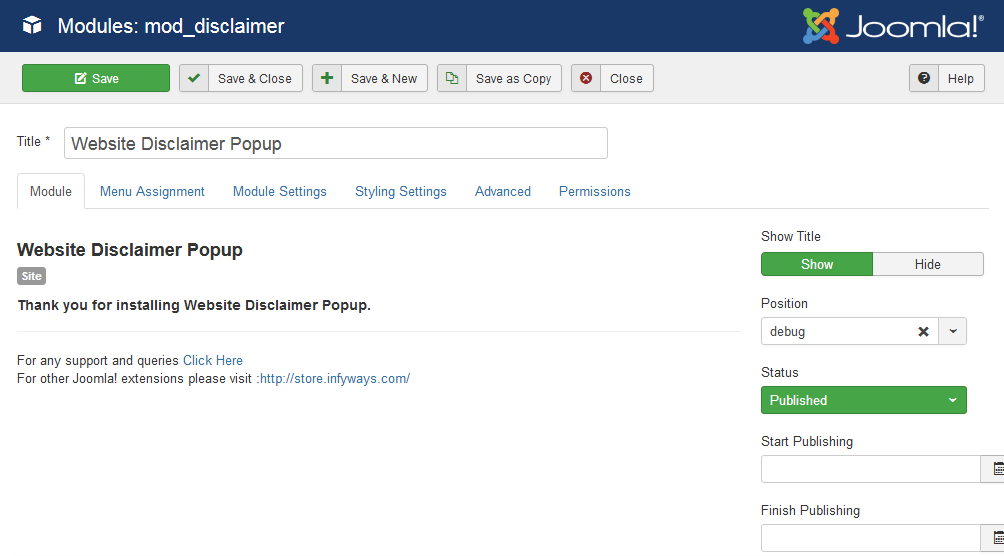
After installation go to Extensions > Module Manager and open Website Disclaimer Popup. You will find the following options in the first tab.
- Change the "Title of the module if you want.
- Set show title to Hide
- Select an existing template position
- Choose the Status to Published
Which position should you activate the Website Disclaimer Popup?
You can activate the extension in any of the existing positions of your template. It is recommended to activate the module in "debug" position if available.
Module Settings
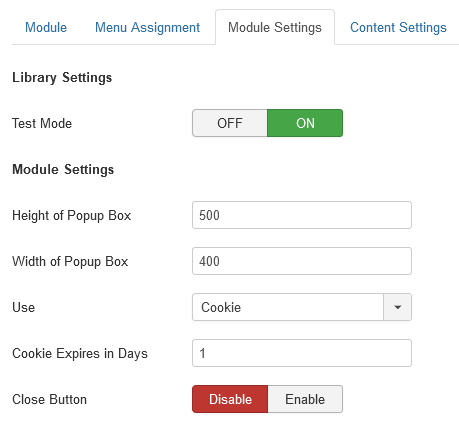
- Test Mode : If the test mode is set to ON cookies/session doesn't get stored in the browser. Once you have completed all the settings you can set it to OFF. The feature is provided to complete all the settings properly before the cookie or session is set for the browser and you don't have to clear your browser cookie to complete the correct settings again and again. If you want the popup to open again and again for every single visit then you can set it to ON, the cookie or session won't get stored.
- Height of Popup Box : Set the height of popup box in pixels. For example if you want to set the height as 500px, then mention 500. The extension is responsive, if you don't have contents which will need 500px height, then it will automatically resize to smaller.
- Width of Popup Box : Set the width of the popup box in pixels. This will be the maximum width of the popup. It will automatically resize according to screen size. Set 800 if you want maximum width of the popup box as 800px
- Use : You can either Use Cookie or session mode depending upon your requirements. If your use mode as session then the popup will show again when you restart the browser but if you set as Cookie it will show after the minutes/hours/days mentioned in the "Cookie Expired Time". This will work only when the test mode is set to OFF.
- Cookie Expires in Days : Mention the number of days after which the cookie will expire and the popup will show again.
- Close Button : You can set the close button of the popup to ON or OFF depending on your requirements.
Link Settings
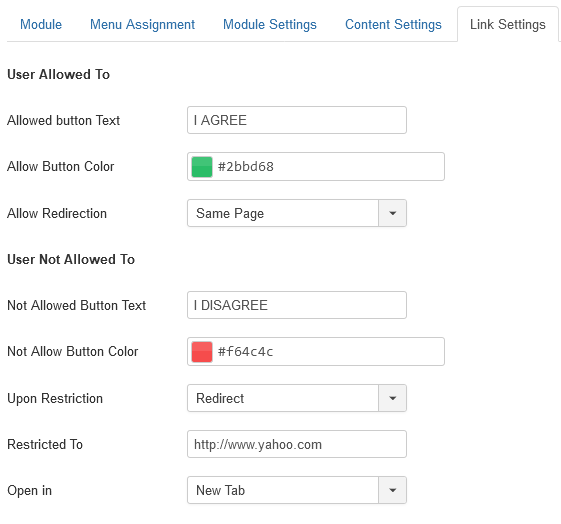
- Allowed Button Name: Shows the text to be displayed over the allowed button.
- Allowed button Color : Choose the color you would like to assign to the allowed button.
- Allow to To: Sets the URL to which URL you want it to redirected after confirming the allowed button.
- Not Allowed Button Name: Shows the text to be displayed for the not allowed button.
- Not Allowed button Color : Choose the color you would like to assign to the not allowed button.
- Upon Restriction: Decides whether to redirect to a safe URL for disallowed visitors. When set to No Direct, the visitor has to manually get out of the website.
- Restrict To: Effective when Upon Restriction is set to Redirect. Sets the URL to which you want to be redirected after declining the allowed button.
- Open in : Option to open the URL in new or same tab.
Content Settings
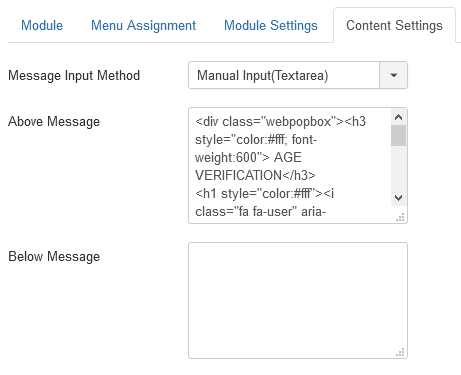
- Message Input Method : You can use Joomla Articles or Manual Textarea to add contents into the popup.
- HTML or Plain Text - For HTML or plain text you can use both the methods. HTML or Text Input or Joomla Articles.
- Image - For image you can use the following HTML text <img src="/YOUR_Path"/> and add it into the HTML or Text Input (Message Above or Message Below) or directly insert the image into an article and select and article in the module parameters.
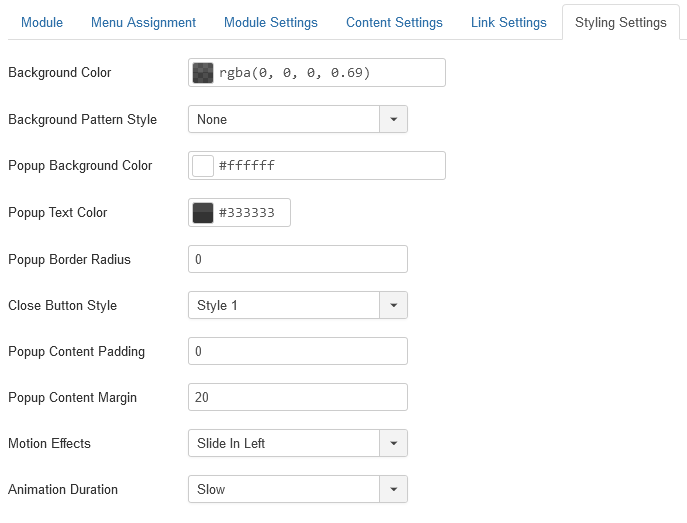
Styling Settings
- Background Color : Select the background color of the popup using the color picker. If you don't want any background color then adjust the opacity from the RGBA color picker.
- Background Pattern Style : Choose a pattern from a list of 10 predefined pattern styles. Set to none if you don't want any background patterns.
- Popup Background Color: Option to choose the background color of the popup using color picker.
- Popup Text Color: Choose the color of the text inside the popup.
- Popup Border Radius : Set the corner round radius around the popup box. Example : 4 which means 4 pixels.
- Close button Style: Choose close button style from the list of 10 predefined styles.
- Popup Content Padding : Padding around the popup content box.
- Popup Margin Padding : Margin around the popup content box.
- Motion Effects : Select a animation effect for the popup.
- Animation Duration : Option to control the speed of animation to slow, slower, fast or faster.
Advanced
- Module Suffix : Add a suffix class to the module to add extra css and customize the module.
- Disable for Mobile Devices : Set to Yes if you want to set the popup disabled for mobile devices
- Scroll Webpage : Set to Yes if you want the webpage to scroll when the popup is open.
- Show after login : You can set it to Yes i you want to show the popup only after an user login into the website.
- Add Extra CSS : You can add extra css directly by adding into this field.
Troubleshoot
- Check properly that you have activated the module in an existing template position.
- If you are using firefox or google chrome the right click on your website and click on view page source. In the source code see if file like jquery.disfancybox.js and jquery.disfancybox.css are loading. If the files aren't loading then it will make sure that module isn't activated on the page.
- If the joomla cache is activated try to clear it once after you make the changes to the module parameter settings.