Component Configuration
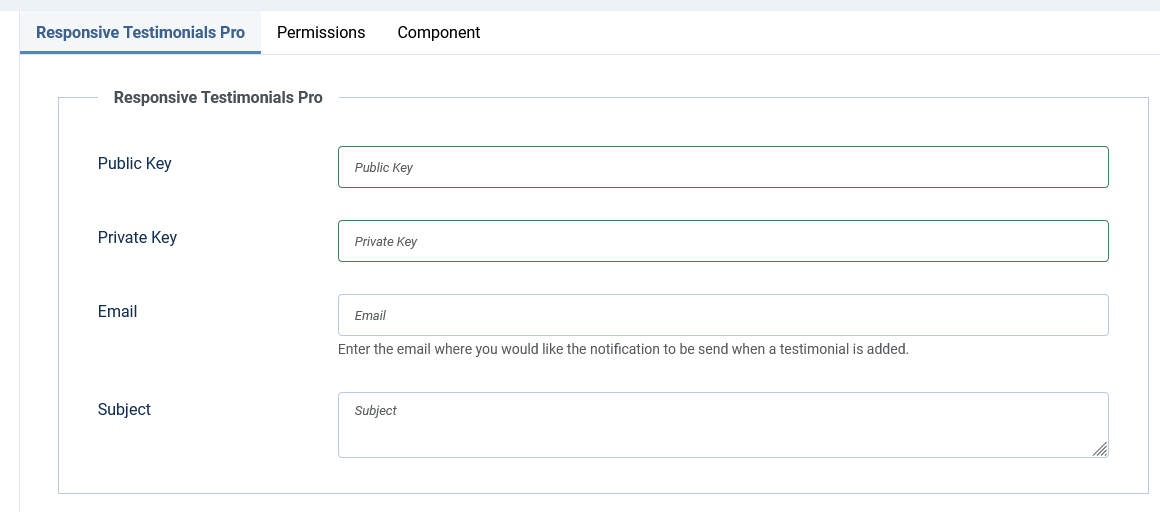
After installing the "Responsive Testimonials Pro" package on your Joomla site, the immediate next step is to configure its settings. Begin by navigating to Components > Responsive Testimonials Pro, then click on "Testimonials". On this page, you'll notice an "Options" button located at the top right corner. Clicking this button will open the component configuration panel where you can configure all the extension settings.
Setting Up Google reCAPTCHA v3
The extension uses Invisible Google reCAPTCHA v3 for enhanced security against spam and bot submissions. This is a crucial step to protect your testimonial forms from spam.
Step-by-Step Guide to Obtain reCAPTCHA Keys:
-
Visit Google's reCAPTCHA Page: Access Google reCAPTCHA Admin Console.
-
Sign In: Use your Google account to log in, or create one if needed.
-
Register Your Site: Click the "+" button or "Create" to register a new site.
-
Configure Your Site:
- Label: Enter a descriptive label for your reCAPTCHA (e.g., "My Website Testimonials") for easy identification.
- reCAPTCHA Type: Select "reCAPTCHA v3" from the dropdown menu. This is important - v3 is invisible and doesn't require user interaction.
- Domains: Enter your site's domain(s) one per line. For example:
example.com(without http:// or https://)www.example.com(if you use www)localhost(for local development)- Owners: Verify your email is listed as the owner, or add additional email addresses if needed.
-
Accept Terms and Submit: Check the "I'm not a robot" checkbox, accept the terms of service, and click "Submit" to complete the setup.
-
Obtain Keys: After submission, you'll be redirected to a page displaying your keys:
- Site Key (Public Key): This is safe to expose in client-side code. Copy this key.
- Secret Key (Private Key): Keep this secret and never share it publicly. Copy this key.
Entering Keys in Component Options
Now that you have your keys, follow these steps:
- Navigate to Components > Responsive Testimonials Pro > Testimonials.
- Click the Options button in the top right corner.
- In the configuration panel, you'll see two fields:
- Public Key: Paste your Site Key (Public Key) from Google here.
- Private Key: Paste your Secret Key (Private Key) from Google here. This field is masked for security.
- Click Save or Save & Close to save your settings.
Configuring Email Notifications
The extension can send email notifications when new testimonials are submitted. Configure this as follows:
-
Notification Email: Enter the email address where you want to receive notifications for new testimonial submissions. This can be your admin email or any email address you prefer. Leave empty to disable email notifications.
-
Email Subject: Customize the subject line for notification emails. You can use placeholders that will be replaced with actual values:
{name}- Will be replaced with the testimonial author's name{email}- Will be replaced with the testimonial author's email
Example: "New testimonial submission from {name}" will become "New testimonial submission from John Doe"
Email Approval & Publishing Feature
This powerful feature allows you to approve and publish testimonials directly from your email without logging into the backend!
-
Enable Email Publish Link:
- Set this to "Yes" to enable the email approval feature.
- When enabled, notification emails will include a secure link to publish the testimonial directly.
- Set to "No" if you prefer to approve testimonials only through the backend.
-
Publish Link Expiry (Days):
- Set the number of days the publish link will remain valid (between 1 and 30 days).
- After this period, the link will expire for security purposes.
- Recommended: 7 days for balance between convenience and security.
How It Works:
- When a testimonial is submitted, you receive an email notification.
- The email contains a secure "Publish" link (if enabled).
- Click the link in your email to instantly publish the testimonial.
- No need to log into the Joomla backend!