Mail & Auto-reply
- Recipient: the address that receives form notifications.
- Subject and introduction text for the admin email.
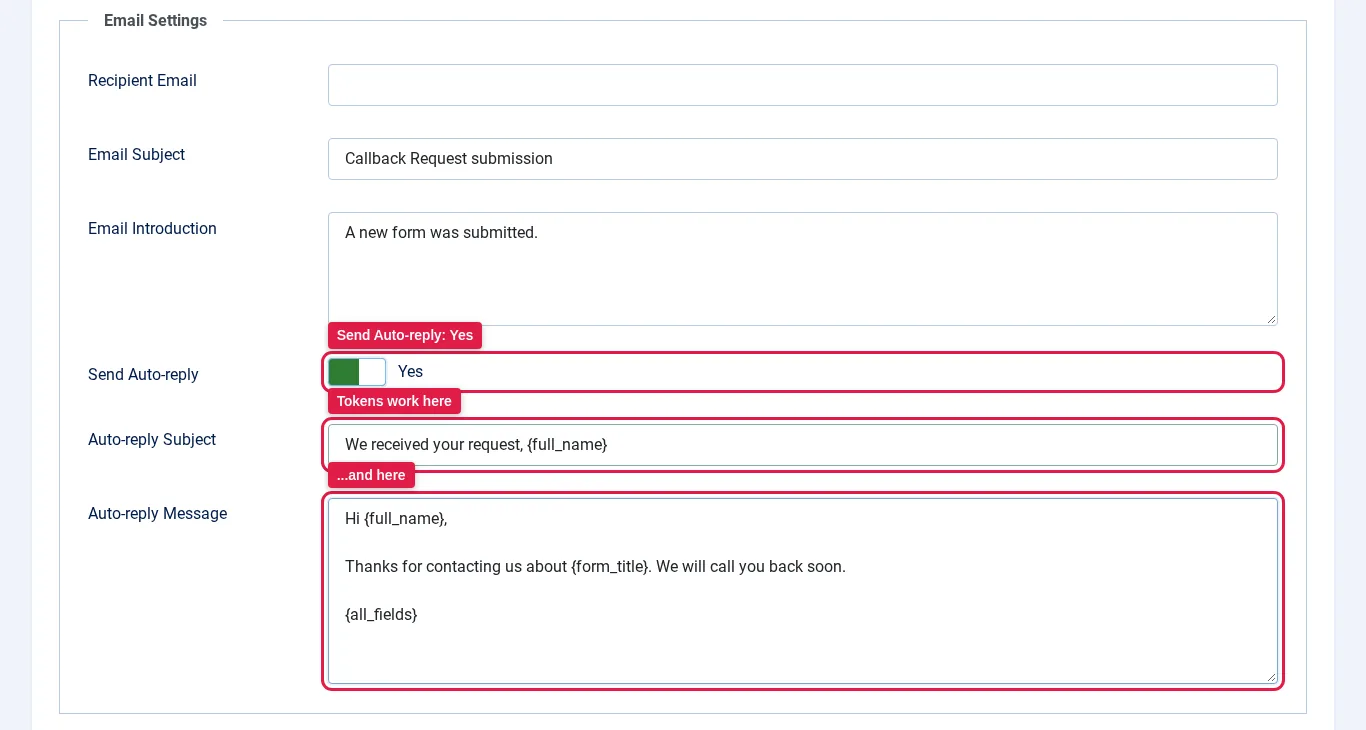
- Auto-reply: optional confirmation email to the submitter.
- Tokens: placeholders such as
{full_name},{all_fields}, and{form_title}that you can use in the auto-reply. See below. - Redirect URL: optional absolute HTTPS URL or site-relative path after a successful submission.
Email tokens
Tokens let the auto-reply include what the visitor entered. They work only in the Auto-reply Subject and Auto-reply Message fields, and only when Send Auto-reply is set to Yes. The admin Email Subject and Email Introduction do not replace tokens; the admin email always lists every submitted field.
How to build a field token
- Take the field's Label exactly as it is set in the Form Builder tab.
- Write it in lowercase.
- Replace every space or other character that is not a letter or number with an underscore
_. Several in a row become one underscore, and underscores at the start or end are dropped. - Wrap it in curly braces.
| Field label | Token |
|---|---|
| Name | {name} |
| Full Name | {full_name} (not {fullname} or {name}) |
{email} | |
| Best time to call | {best_time_to_call} |
| E-mail Address | {e_mail_address} |
Built-in tokens
{all_fields}: every field the visitor filled in, one per line, as Label: value.{form_title}: the module's Form Heading setting.
Things to check
- The auto-reply needs an email address. It is sent to the first Email-type field the visitor fills in. If the form has no Email field, or it is left empty, no auto-reply is sent.
- Renaming a field changes its token. The default Auto-reply Message starts with
Hi {name},. If you rename the Name field to Full Name, change{name}to{full_name}in the message too. Otherwise the email shows the text{name}literally. - Empty fields are not replaced. If an optional field is left blank, its token stays in the email as plain text, so use tokens for required fields or rely on
{all_fields}.