First-time setup
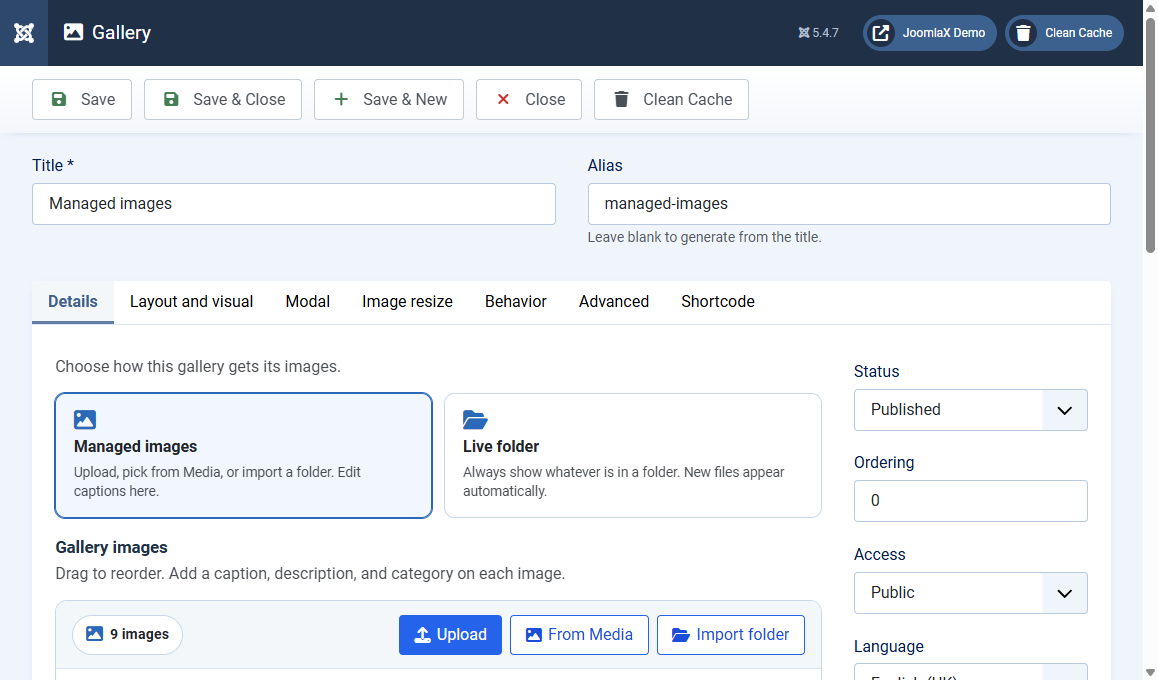
Follow these steps in order the first time. You can finish in about 15 minutes.
1. Create a gallery
- Go to Components > Vertex Gallery.
- Click New.
- Type a Title, for example School Photos.
- Leave Alias blank (Joomla builds it from the title).
- Keep Managed images selected.
- Click Upload or drop photos onto the drop zone. You can also click From Media or Import folder.
- Optional: type a Caption, Description, and Category on each photo.
- Set Status to Published.
- Click Save & Close.
2. Copy the shortcode
On the Galleries list, each row shows {vertexgallery id="1"} and a Copy button. Click Copy.
3. Enable the content plugin
System > Plugins > search Vertex Gallery > enable Content - Vertex Gallery.
4. Put it in an article
- Open an article (or create one).
- Paste the shortcode where the gallery should appear.
- Or click the Vertex Gallery button in the editor and choose Insert.
- Save the article.
5. Check the front end
- Open the article on the site.
- You should see the photo grid.
- Click a photo. The lightbox should open.
- If something looks old, clear cache and hard-refresh (Ctrl+F5).
Student tip
Start with Managed images and 4 to 9 photos. Learn Live folder, masonry, and lightbox options after the first gallery works.